PREFACE
Welcome to the new edition of kpi.com Payroll Guidebook.
This Guidebook is designed to instruct you through kpi.com Payroll features and it is the primary assistant in case, you have any frustrations using the system tools.
kpi.com Payroll User`s Guide contains information on getting to know and using the system features.
- Getting Started views the whole map of Payroll to make easier the management of creating and working with reports.
- Payroll Welcome describes how to manage reports of the whole system directly from that page.
- Payment/Deduction section provides you with the step-by-step diagram which instructs you through several steps to run a report.
- Payslip List fully describes how to export reports from kpi.com Reporting System.
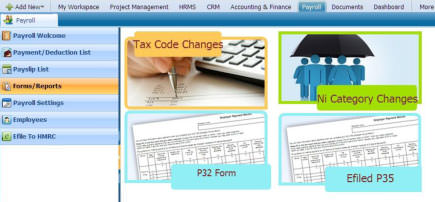
- In the ‘Forms/Reports’ section, you will be introduced how to view tax code changes, NI category changes, P32 and efiled P35 forms.
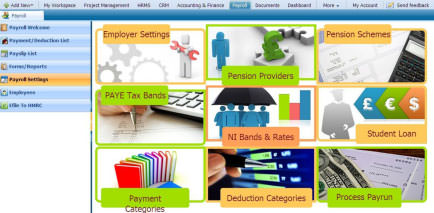
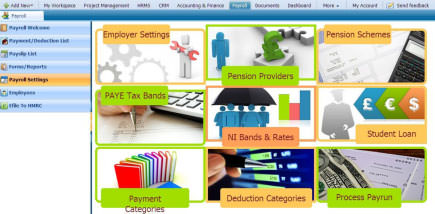
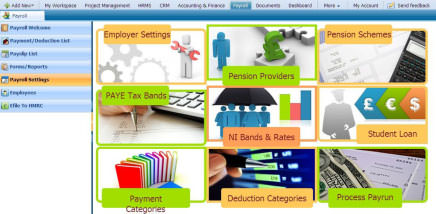
- Payroll Settings section contains several sub-functional sections as employer settings, pension providers and schemes, PAYE tax bands, student loan, payment categories and others.
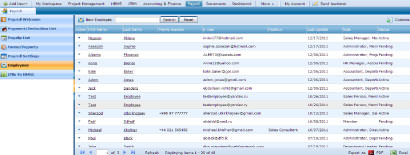
- Employeessection is a part of Payroll system due to every payment is related with employees and this page illustrates the list of all company employees where you can perform several functions from the actions list of each employee.
- Efile to HMRC This section will be developed especially for submitting annual tax return to HMRC (Her Majesty’s Revenue and Customs) online.
About kpi.com.COM Software Company
kpi.com.™ Software Company privately held by UK-based Finnet Limited firm. kpi.com. provides an integrated stripe of software products for project management, customer relationship management, management of accounting and finance, e-commerce, reporting and human resources management. kpi.com enables companies to integrate the products to personal computers, minicomputers, network computers and personal digital assistants.
kpi.com.COM, is a simple, low-cost ‘All-In-One’ Cloud based Business application platform. The integrated suite of applications has been designed to remove the necessity of investing in on-site back office administration and control systems, thereby allowing firms to concentrate on delivering their core, value adding services to their customers. Delivering the solution via the Cloud enables management and staff to share information and manage their operations regardless of location, thereby increasing their efficiency, responsiveness and competitiveness whilst minimising their investment in operational overhead.
kpi.com’s cloud delivered SaaS ensures that all elements of the business are connected. Information, staff, sales and service, front office operations, back office functions, management and control are available immediately from any location and can be shared across the organization.
Customer Feedback
We appreciate you using our kpi.com Payroll and this Guidebook.
Our customers’ comments and feedback are always welcome. You will find the Reader’s Questionnaire Form about kpi.com features at the end of the guide. Do not hesitate to mail your comments and wishes to the following e-mail address or you can directly contact with your kpi.com Support Manager.
E-mail: support@www.kpi.com
Phone: +44 () 844 484 1120
+44 (0) 844 484 2958
+44 (0) 844 774 2253
+44 (0) 208 313 0711
GETTING STARTED
kpi.com Payroll helps to distribute payslips to employees each payday, record total earnings of all employees for a company in a fiscal year and keep track employees’ wages/salaries, withholding, deductions and other items on employeepayslips.kpi.com Payroll ensures strong security and strict privacy is maintained.
HOW TO GET AN ACCESS
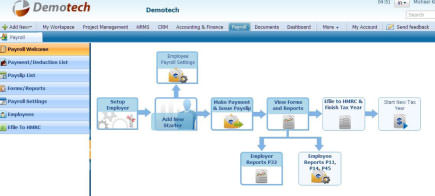
kpi.com Payroll tool is located on the top tab of the main menu as shown in the screenshot:
 <alt=»Payroll System»>
PAYROLL WELCOME
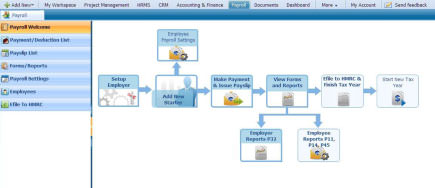
The Payroll Welcome is set as a default page. You are be able to perform several functions as setting up an employer, adding new starter, making payment and viewing form & reports.
 <alt=»Payroll System»>
SETUP EMPLOYER
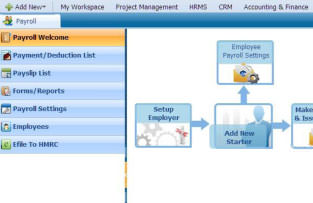
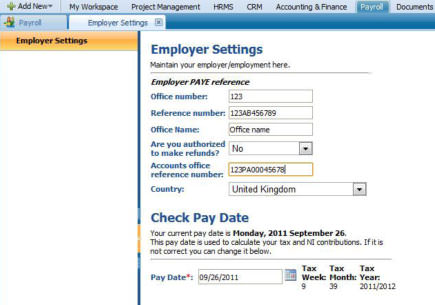
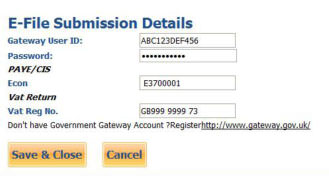
This feature will lead you to Employer Settings page where you can maintain your employment, check pay date and provide with e-file submission details.
 <alt=»Payroll System»>
 <alt=»Payroll System»>
 <alt=»Payroll System»>
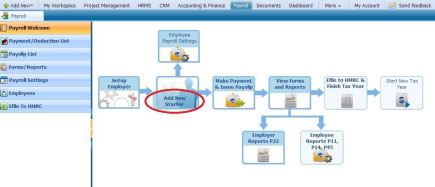
ADD NEW STARTER
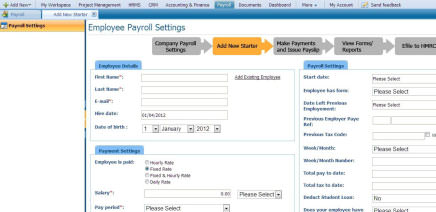
You will be directed to Employee Payroll Settings page through Add New Starter. You are advised to fill in the employee details, payment settings, and payroll settings fields.
 <alt=»Payroll System»>
 <alt=»Payroll System»>
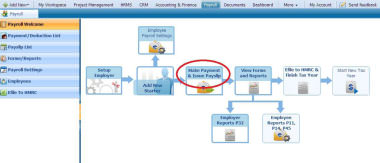
MAKE PAYMENT & ISSUE PAYSLIP
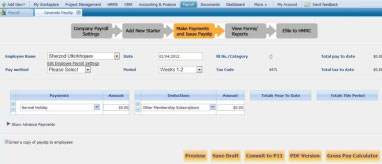
This is the third step of Payroll Welcome section. You will get a form called Generate Payslip where you should indicate employee name, pay method, period and add a category of payments, and deductions.
 <alt=»Payroll System»>
 <alt=»Payroll System»>
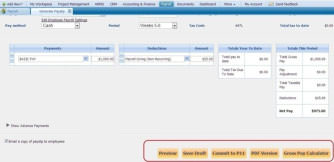
Once you have completed the form, you can preview it, save as a draft, commit to P11 form, import to PDF or calculate Gross Pay clicking on the buttons below the form.
 <alt=»Payroll System»>
VIEW FORMS & REPORTS
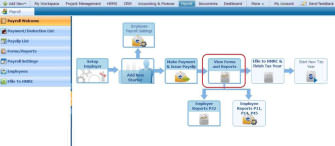
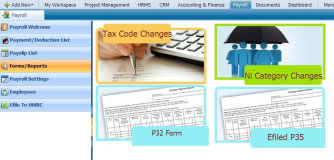
You are able to view forms and reports through Payroll Welcome default page. There are four things you can view: Tax code changes, NI category changes, P32 form and e-filed P35. (For more information about
Forms & Reports, go to Forms/Reports page in the Guidebook).
 <alt=»Payroll System»>
 <alt=»Payroll System»>
PAYMENT/DEDUCTION LIST
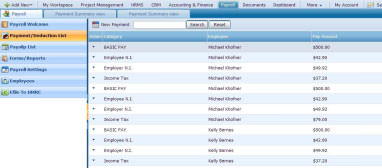
The Payment/Deduction List contains the list of all payments and deductions made to your employees both from issued payslips and adding New Payment/Deduction directly.
 <alt=»Payroll System»>
ADD A NEW PAYMENT
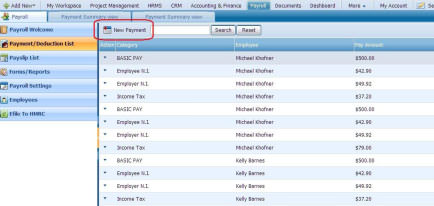
To add a new payment, go to Payment/Deduction List and click on New Payment tab located on the top side of the page.
The form will appear with the following fields:
Category — Select necessary payment/deduction category
Employee — Choose the employee you want to record the payment for
Pay Amount — The sum of money to be paid/deducted
Pay Date — Date when payment/deduction should be made
Click on the Save button below the page.
 <alt=»Payroll System»>
 <alt=»Payroll System»>
PAYMENT SUMMARY
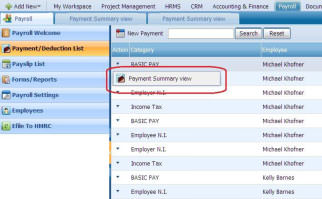
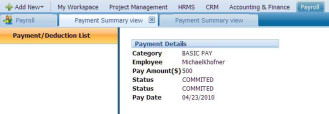
The payment summary is located in the Actions list of each payment. Click on the Payment Summary view to see details of the payment/deduction.
 <alt=»Payroll System»>
 <alt=»Payroll System»>
PAYSLIP LIST
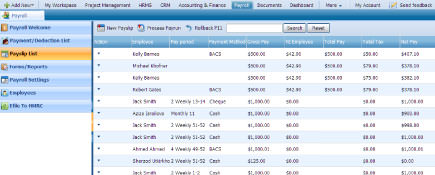
The Payslip List is a section which contains the list of all payslips issued to your employees. In the section, you can Edit Payslip (saved as draft), download its PDF version and Add New Payslip.
 <alt=»Payroll System»>
NEW PAYSLIP
To add a new Payslip, go to Payslip List and click on the New Payslip button located on top side.
 <alt=»Payroll System»>
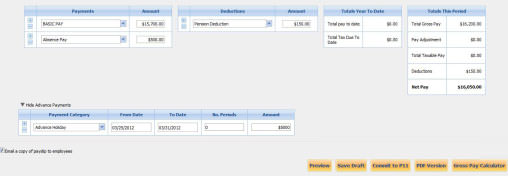
The form with the following fields will appear:
Employee Name — choose the employee you want to issue this payslip for (if the employee does not appear in the drop-down, you probably need to fill in his/her payroll settings first. In order to do that,
please go to Employees and in the actions drop down choose Payroll Settings). After an employee is chosen, his/her predefined payroll details will be loaded into the payslip form.
Pay method — choose payment method for this employee. If payment method is already specified in the payroll settings of the employee, it will appear automatically.
Date — Date of payment that will be displayed on the payslip.
Period — Time period that this payment applies to. Date and Period are interconnected.
NI No./Category — National Insurance Category of the employee.
Tax Code — Tax code of the employee.
Total pay to date — Total amount of pay made to the employee in the current year.
Total tax to date — Total tax deducted from the employee’s earnings in the current year.
 <alt=»Payroll System»>
Payments — Payment categories that will be used in current payslip
Deductions — Deduction categories that will be used in current payslip
Totals Year to Date — Total pay to date and Total tax to date, including figures from the current payslip (appear after pressing Preview)
Totals This Period — Total gross pay, Pay adjustment, Total taxable pay, Deductions and Net pay calculated for the current payslip (appear after pressing Preview)
Advance Payments – Payments in advance for future pay periods. You can register them separately from regular payments.
Email a copy of payslip to employees — Tick this option to send PDF version of the payslip to employee.
Preview — After filling in all necessary details, press this button to preview the final result.
Save Draft — Save the payslip as a draft version to edit and commit it later.
Commit to P11 — Finalize the payslip and record the changes in the P11 form (Deductions Working Sheet) of that employee.
PDF Version — Download and view PDF version of the payslip before committing it.
Gross Pay Calculator — If in Payroll Settings of the employee, his Salary is defined as Net, you can use this option to calculate Gross pay.
 <alt=»Payroll System»>
PROCESS PAYRUN
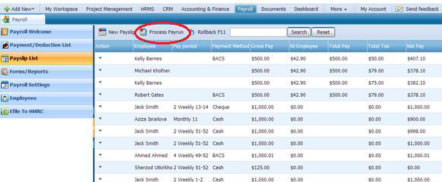
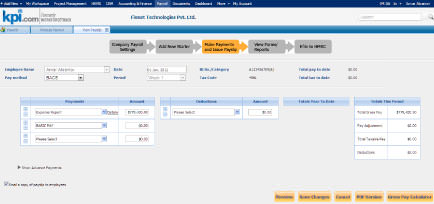
Process Payrun is the functionality for processing payslips in bulk for employees with the same pay period (monthly, 4 weekly etc.). In order to access this feature, please go to Payslip List and click on the
Process Payrun button which gives you the following form shown in the screenshot:
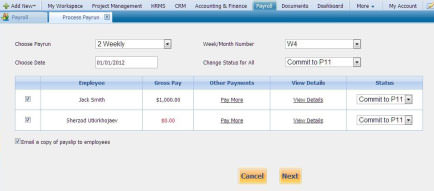
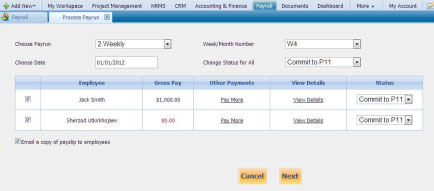
Choose Payrun — Choose for which pay period you would like to process payslips.
Choose Date — Choose the date that will be recorded as Pay Date on the issued payslips.
Week/Month Number — Choose week/month for which you would like to process payrun.
Change Status for All— Choose the status for all payslips that will be issued.
When you fill in all the necessary details, the list of all employees with the specified pay period will be loaded to the form. You can untick those employees that you don’t want to include in the current payrun. You can also view details of each particular payslip by clicking on View Details.
 <alt=»Payroll System»>
In order to edit some payslips, click on Pay More. Form resembling the payslip will appear where you will be able to add, edit or remove payment and deduction categories.
You can also change the status of each payslip separately by clicking on Status drop-down.
Email a copy of payslip to employees — Tick this option to send PDF versions of the payslips to employees.
In order to proceed, click on Next button.
 <alt=»Payroll System»>
 <alt=»Payroll System»>
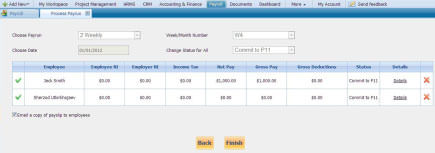
The finalised list of the employees with their payment details will appear. In order to view particular payslip, please click on Details. You can still exclude some employee from Payrun by clicking on the cross on the right-side of each record.
Click on Finish button to complete payrun and send PDF payslips to your employees.
 <alt=»Payroll System»>
ROLLBACK P11
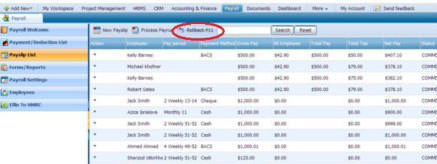
Rollback P11 is a function which helps to delete entries in the P11 form for a specified period.
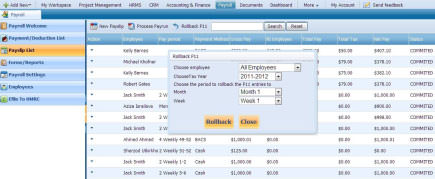
When you click on Rollback P11, the following form will appear:
Choose employee — Choose the employee whose P11 form you would like to edit.
Tax Year — Choose the appropriate tax year.
Month — Choose the month number, until which you wish to remove entries (inclusively).
Week — Choose the week number, until which you wish to remove entries (inclusively).
Rollback — Click on this button to complete the operation.
 <alt=»Payroll System»>
 <alt=»Payroll System»>
FORMS/REPORTS
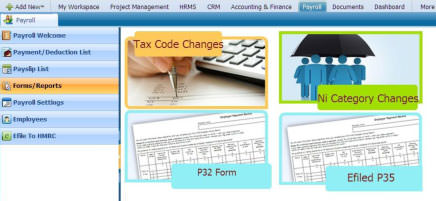
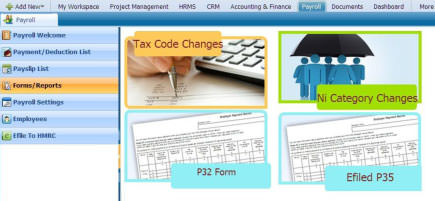
In the Forms and Reports section, you can view Tax Code Changes, NI Category Changes, P32 and efiled P35 forms. It is the fourth section of kpi.com Payroll.
 <alt=»Payroll System»>
TAX CODE CHANGES
In this listing, all changes in the tax codes of your employees are recorded. Whenever tax code of some employee is changed in their Payroll Settings, it will be reflected in the Tax Code Changes Listing. It is located in the Form and Reports section.
 <alt=»Payroll System»>
 <alt=»Payroll System»>
NI CATEGORY CHANGES
In this listing, all National Insurance categories changes are recorded. Whenever NI category of some employee is changed in their Payroll Settings, it will be reflected in the NI Category Changes listing. It is located in the Form and Reports section.
 <alt=»Payroll System»>
 <alt=»Payroll System»>
P32 FORM
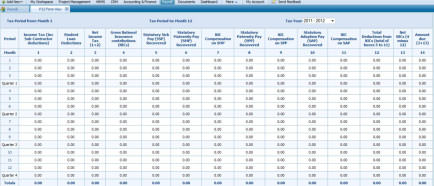
Each time you pay to your employees, necessary figures will be recorded in this electronic P32 form. Users of kpi.com Payroll are able to view P32 Form through Forms and Reports section.
 <alt=»Payroll System»>
 <alt=»Payroll System»>
EFILED P35
In this section, you will be able to view your e-filed P35 form.
 <alt=»Payroll System»>
PAYROLL SETTINGS
To perform the payroll administration correctly, you can use Payroll Settings which arelocated after the Forms and Reports section in kpi.com Payroll.
 <alt=»Payroll System»>
EMPLOYER SETTINGS
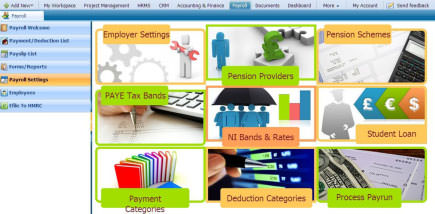
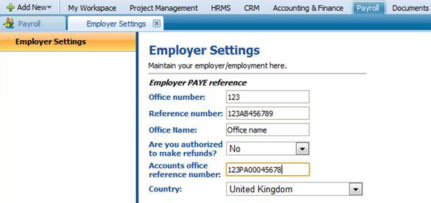
Employer PAYE reference
Office number — write your office number given by HMRC
Reference number — Employer PAYE Reference Number
Office name — Indicate your office denomination
Are you authorized to make refunds? — State your possibility to repay the amount
Accounts office reference number — Indicate registration number of the office account
Country— Identify your location
 <alt=»Payroll System»>
 <alt=»Payroll System»>
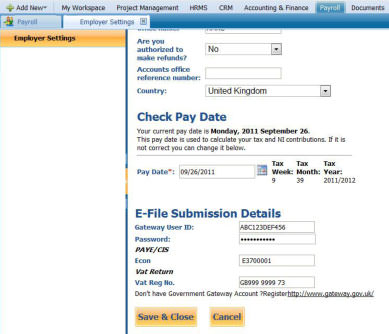
Check Pay Date
Pay Date — Inform about the date of your payment.
E-file Submission Details
Gateway User ID — User access name.
Password — User watchword.
Econ — Employers contracting-out number
Vat Reg No. – Value added tax registration number
 <alt=»Payroll System»>
PENSION PROVIDERS
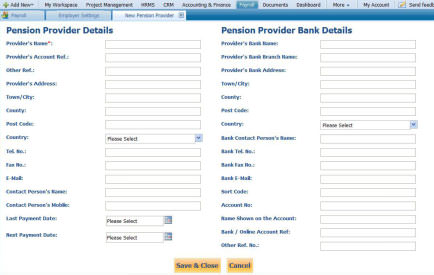
Use this section to add Pension Providers to the system. Added pension providers will be displayed in the Scheme Provider field, when adding new Pension Scheme. It is the second tab in Payroll Settings.
 <alt=»Payroll System»>
 <alt=»Payroll System»>
PENSION SCHEMES
Pension Schemes section contains the list of all Pension Schemes, registered for your company. Here you can view details of the scheme, edit or remove it from the list. Besides, you are able to add a new pension scheme from this page.
 <alt=»Payroll System»>
NEW PENSION SCHEME
To add a new pension scheme, go to Payroll Settings from Payroll, open Pension Schemes page and click on the New Pension Scheme located on the top tab.
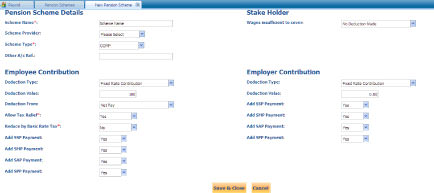
The following form will appear:
Pension Scheme Details
Scheme Name — Specify the name of the Pension Scheme.
Scheme Provider — Choose Pension Provider from the list (if no provider appears in the drop-down, then add a Pension Provider first. In order to do that, go to Payroll Settings and click on Pension Providers).
Scheme Type — Choose Pension Scheme type from the list.
Other A/c Ref. — Specify Other Account Reference.
 <alt=»Payroll System»>
 <alt=»Payroll System»>
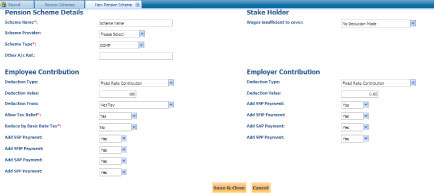
Employee Contribution
Deduction Type — Specify if deduction will be calculated as a fixed amount or percentage.
Deduction Value — Specify fixed amount or percentage to be deducted.
Deduction From — Choose if Pension Deduction should be taken from Gross Pay or Net Pay.
Allow Tax Relief — Specify if tax relief should be allowed.
Reduce by Basic Rate Tax — Specify if pension deduction amount should be reduced by basic rate tax.
Add SSP Payment — Specify if Statutory Sick Pay should be added.
Add SMP Payment — Specify if Statutory Maternity Pay should be added.
Add SAP Payment — Specify if Statutory Adoption Pay should be added.
Add SPP Payment — Specify if Statutory Paternity Pay should be added.
 <alt=»Payroll System»>
Stake Holder
Wages insufficient to cover — Choose the action to be made, if employee’s wage is not enough to cover Pension Deduction.
Employer Contribution
Deduction Type — Specify if deduction will be calculated as a fixed amount or percentage.
Deduction Value — Specify fixed amount or percentage to be deducted.
Add SSP Payment — Specify if Statutory Sick Pay should be added.
Add SMP Payment — Specify if Statutory Maternity Pay should be added.
Add SAP Payment— Specify if Statutory Adoption Pay should be added.
Add SPP Payment — Specify if Statutory Paternity Pay should be added.
 <alt=»Payroll System»>
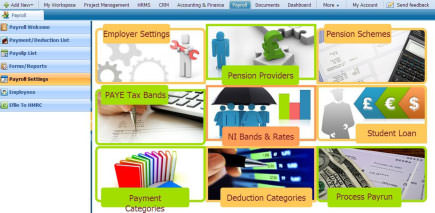
PAYE TAX BANDS
PAYE Tax Bands section helps you to keep records of PAYE tax bands in the system.
 <alt=»Payroll System»>
 <alt=»Payroll System»>
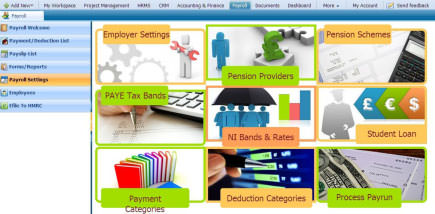
NI BANDS & RATES
NI Bands and Rates section helps you to keep records of NI rates in the system.
 <alt=»Payroll System»>
 <alt=»Payroll System»>
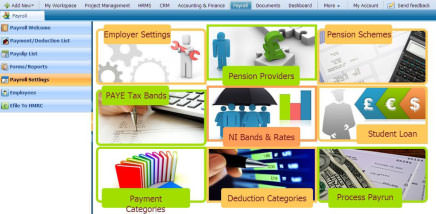
STUDENT LOAN
Through this section, you can view and edit your student loan rate. Once the Student Loan page is opened, make changes and click on the Save button.
 <alt=»Payroll System»>
 <alt=»Payroll System»>
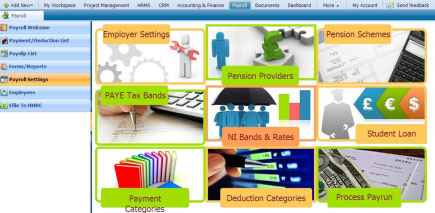
PAYMENT CATEGORIES
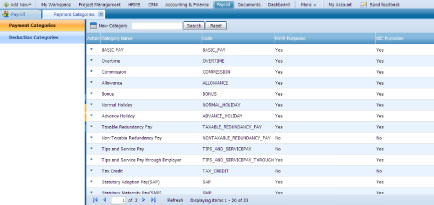
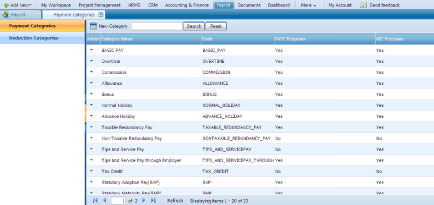
Payment Categories keeps track of list of Payment Categories.
 <alt=»Payroll System»>
 <alt=»Payroll System»>
ADD A NEW PAYMENT CATEGORY
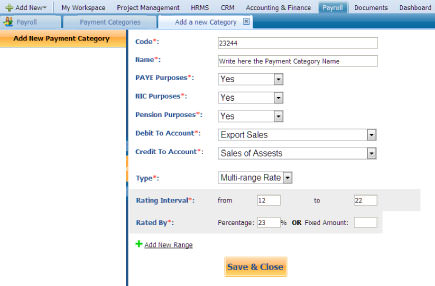
To add a new payment category, go to Payment Categories section in Payroll Settings section and click on the New Category button that is located on the top menu tab.
 <alt=»Payroll System»>
Code — Type unique code given to this Category
Name — Type the name of this Payment Category
PAYE Purposes — Choose if income tax will be deducted from payments of this Category
NIC Purposes — Choose if National Insurance contributions will be deducted from payments of this Category
Pension Purposes — Choose if Pension Deduction will be taken from payments of this Category
Debit to Account — Choose which account to debit when payments of this Category are made (if no accounts appear in the drop-down, you need to first set up Accounting and Finance section)
Credit to Account — Choose which account to credit when payments of this Category are made (if no accounts appear in the drop-down, you need to first set up Accounting and Finance section).
Type — Choose type of rate to apply for this Category. Simple Rate — no rating interval, Multi-range Rate — one or more rating intervals.
Rating Interval (appear only if Type is Multi-range Rate) — Specify the maximum and minimum amount to apply the Rate to
Rated By — Specify fixed or percentage rate that will be used to calculate payment amount of this Category
 <alt=»Payroll System»>
 <alt=»Payroll System»>
EDIT PAYMENT CATEGORY
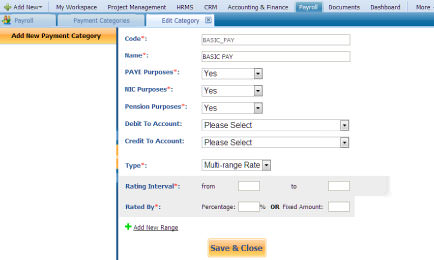
To edit a payment category, click on the Edit Payment Category button through Actions List of Payment Category.
 <alt=»Payroll System»>
 <alt=»Payroll System»>
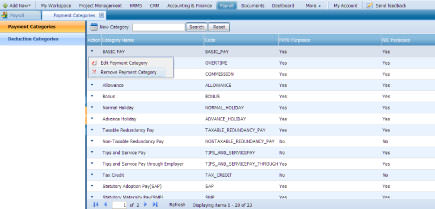
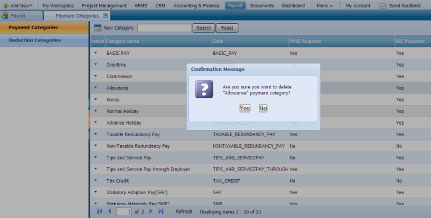
REMOVE PAYMENT CATEGORY
To remove a payment category, click on the Remove Category button from the Actions List of Payment Category. Category will be removed, if it is not used in previously issued payslips.
 <alt=»Payroll System»>
 <alt=»Payroll System»>
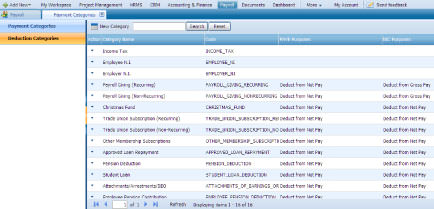
DEDUCTION CATEGORIES
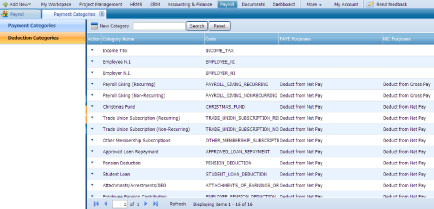
Deduction Categories keeps track of list of Deduction Categories.
 <alt=»Payroll System»>
 <alt=»Payroll System»>
ADD A NEW DEDUCTION CATEGORY
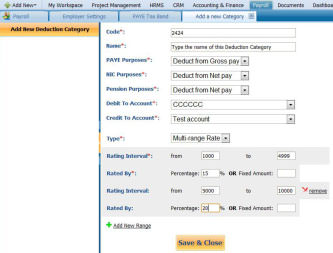
To add a new deduction category, go to Deduction Categories section in Payroll Settings section and click on the New Category button that is located on the top menu tab.
Code — Type unique code given to this Category
Name — Type the name of this Deduction Category
PAYE Purposes — Choose if this Category will be deducted before (Deduct from Gross pay) or after (Deduct from Net pay) income tax
NIC Purposes — Choose if this Category will be deducted before (Deduct from Gross pay) or after (Deduct from Net pay) National Insurance contributions
Pension Purposes — Choose if this Category will be deducted before (Deduct from Gross pay) or after (Deduct from Net pay) Pension Deduction
Debit to Account — Choose which account to debit when deductions of this Category are made (if no accounts appear in the drop-down, you need to first set up Accounting and Finance section)
Credit to Account — Choose which account to credit when deductions of this Category are made (if no accounts appear in the drop-down, you need to first set up Accounting and Finance section)
Type — Choose type of rate to apply for this Category. Simple Rate — no rating interval, Multi-range Rate — one or more rating intervals.
Rating Interval (appear only if Type is Multi-range Rate) — Specify the maximum and minimum amount to apply the Rate to
Rated By — Specify fixed or percentage rate that will be used to calculate deduction amount of this Category
 <alt=»Payroll System»>
 <alt=»Payroll System»>
EDIT DEDUCTION CATEGORY
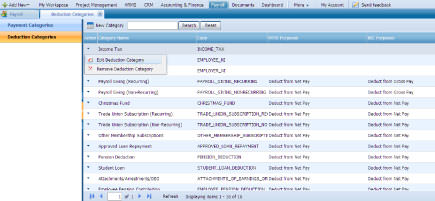
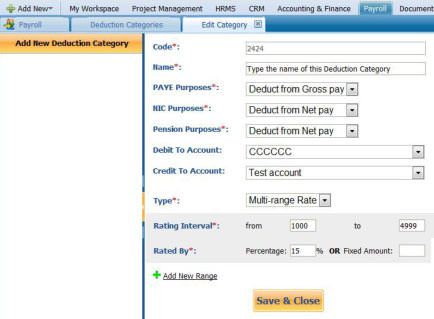
To edit a deduction category, click on the Edit Deduction Category button through Actions List of Deduction Categories.
 <alt=»Payroll System»>
 <alt=»Payroll System»>
REMOVE DEDUCTION CATEGORY
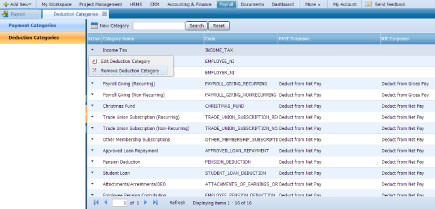
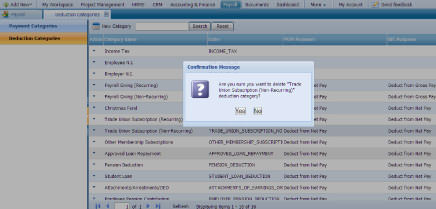
To remove deduction category, click on the Remove Deduction Category button through Actions List of Deduction Categories. Category will be removed, if it is not used in previously issued payslips.
 <alt=»Payroll System»>
 <alt=»Payroll System»>
PROCESS PAYRUN
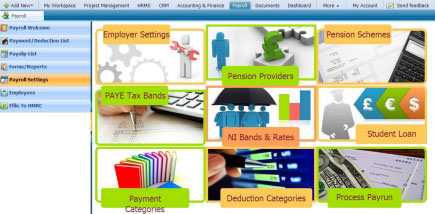
Process Payrun can be found from two sections: Payslip List and Payroll Settings. Please refer to Payslip List section to be introduced with tools of Process Payrun.
 <alt=»Payroll System»>
 <alt=»Payroll System»>
EMPLOYEES
In this section, you can find the list of all employees of your company.
 <alt=»Payroll System»>
NEW EMPLOYEE
You can add a new employee by clicking on the New Employee button that is located on the top menu of Employees page.
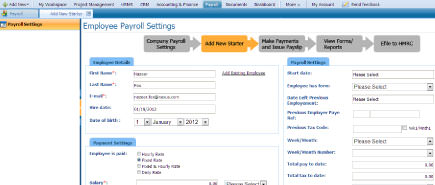
Form with the following fields will appear:
Employee Details
Add Existing Employee — Use data of existing employee to add his payroll settings. After you click on this link, choose employee you need from the drop-down and click OK. Employee details will be loaded to the form.
First Name — Employee’s first name
Last Name — Employee’s last name
E-mail — Employee’s email address
Hire date — Date of beginning a job
Date of birth — Date of employee’s birth
 <alt=»Payroll System»>
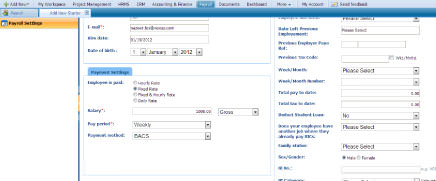
Payment Settings
Employee is paid — Choose appropriate wage rate for the employee (currently, only fixed rate can be applied)
Salary — Enter wage amount. You should also choose from the drop-down if the wage specified is Gross (without taxes) or Net (with taxes)
Pay period — Choose period for payment
Payment method — The way this employee will be paid
Calculate Gross Pay — If in Payroll Settings of the employee, his Salary is defined as Net, you can use Gross Pay Calculator to calculate Gross pay.
 <alt=»Payroll System»>
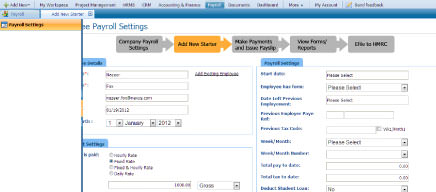
Payroll Settings
Start date — Choose a start date for your payroll
Employee has form — Choose appropriate form (if you choose form P46, please fill in extra fields that will appear at the bottom of the form)
Date left previous employment — Choose the date when this employee left his/her previous employment
Previous employer Paye ref — PAYE reference of the last employer from P45
Previous tax code — Last tax code details from P45
Week/Month — Week/Month of previous employer
Week/Month Number — Week/Month number of previous employer
Total pay to date — Total pay made to this employee until now, in the current tax year
Total tax to date — Total tax deducted from this employee until now, in the current tax year
Deduct student loan — Your agreement for deduction of student loan
 <alt=»Payroll System»>
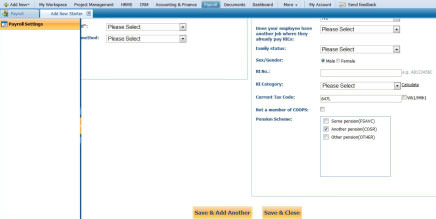
Does your employee have another job where they already pay NICs — Additional information about National Insurance contributions from another job.
Family status — Choose employee’s family status
Sex/Gender — Choose employee’s gender
NI No — Enter National Insurance number
NI Category — Choose National Insurance category
Current tax code — Tax code that this employee has at the moment
Not a member of COOPS — Tick if the employee is not a member of cooperatives
Pension Scheme — If this employee is subscribed to one or more pension schemes, tick them in the list. (If pension schemes do not appear, than you first need to add them through Payroll Settings -> Pension Schemes -> New Pension Scheme)
 <alt=»Payroll System»>
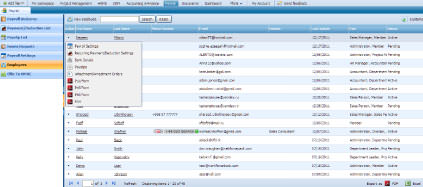
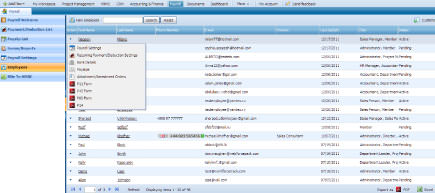
ACTIONS LIST
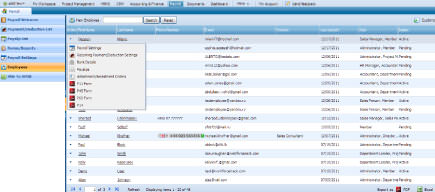
By default the Actions list drop-down is available on the first column of the Employees list. Once clicked, drop-down gives several options as displayed on the screenshot:
 <alt=»Payroll System»>
PAYROLL SETTINGS
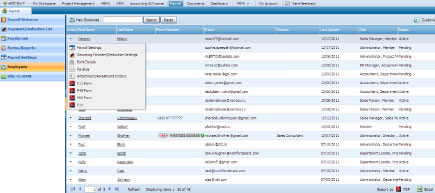
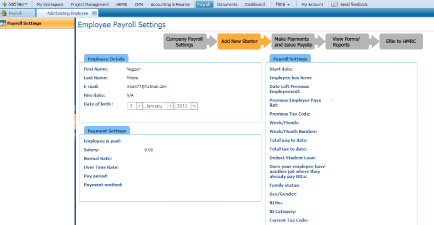
When you click on the Actions list, the first action will be Payroll Settings. You can view and edit payroll settings of a particular employee and save the changes you have made.
 <alt=»Payroll System»>
 <alt=»Payroll System»>
RECURRING PAYMENT/DEDUCTION SETTINGS
Through this feature, you can implement necessary changes of Recurring Payment/Deduction Settings of a particular employee. Payments and deductions, specified here will automatically appear each time you issue a payslip for this employee. As soon as you have modified payment information, save the changes by clicking on the Save Settings button.
 <alt=»Payroll System»>
 <alt=»Payroll System»>
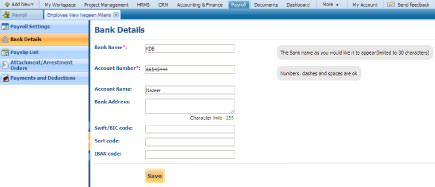
BANK DETAILS
In this section you can enter, view and edit bank details of a particular employee.
 <alt=»Payroll System»>
 <alt=»Payroll System»>
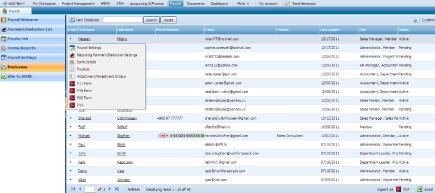
PAYSLIPS
In this section you can view all payslips issued to this particular employee.
 <alt=»Payroll System»>
 <alt=»Payroll System»>
ATTACHMENT/ARRESTMENT ORDERS
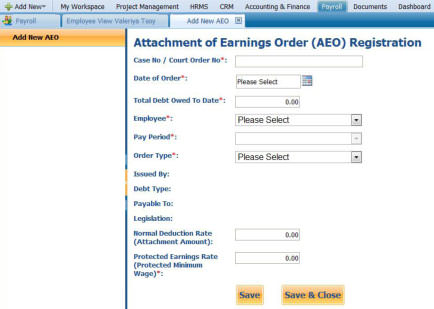
In this section you can view all Earnings Arrestment Orders of this particular employee. In order to add new Attachment/Arrestment Order, click on the New AEO, located on the top tab.
Form with the following fields will appear:
Case No/ Court Order No — Court order number
Date of Order — Date of the court order
Total Debt Owed To Date — The amount of money that the employee owes
Employee — Choose relevant employee
Pay Period — Pay period for this AEO
Order type — Choose appropriate order type (Issued By, Debt Type, Payable To and Legislation will be filled in automatically according to the chosen order type)
Normal Deduction Rate (Attachment Amount) — Amount of money that will be deducted each time employee receives his/her salary.
Protected Earnings Rate (Protected Minimum Wage) — Amount of money below which AEO deduction will not be made
 <alt=»Payroll System»>
 <alt=»Payroll System»>
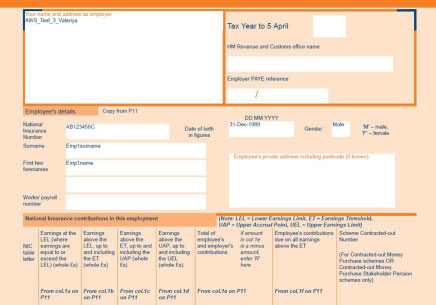
P11 FORM
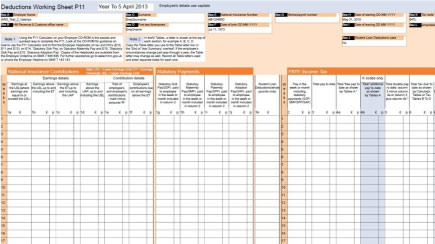
You can download P11 form (Deductions Working Sheet) in PDF format for each particular employee.
 <alt=»Payroll System»>
P45 FORM
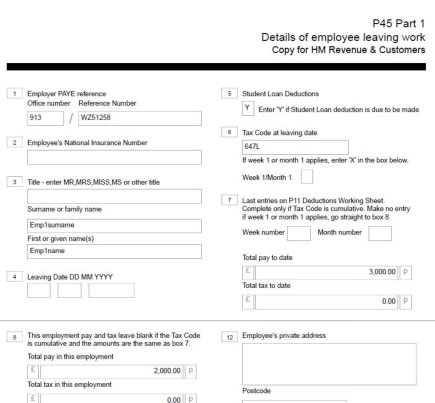
You can download P45 form (Details of employee leaving work) in PDF format for each particular employee.
 <alt=»Payroll System»>
P60 FORM
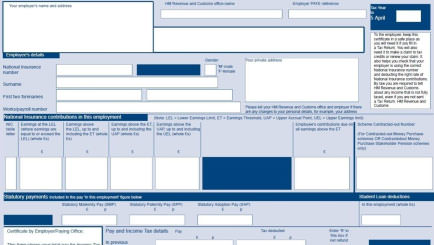
You can download P60 form (End of Year Certificate) in PDF format for each particular employee.
 <alt=»Payroll System»>
P 14 FORM
You can download P14 form (End of Year Certificate) in PDF format for each particular employee.
 <alt=»Payroll System»>
EXPORTING FILES
You are able to export your files to PDF and Excel.
 <alt=»Payroll System»>
CUSTOMIZATION TOOL
Customization Tool is a tool primarily used by users to set buttons you want to see on the each page. Every section has a customization tool on the top side of the page:
 <alt=»Payroll System»>
GLOSSARY
Employees – The list of your employees together with their personal Payroll Settings, Bank Details and Arrestment Orders. Downloadable forms P11, P45, P60, P14 in PDF format. Recurring Payments and Deductions can be set up for any particular employee.
Forms/Reports – Save records of changes in employees’ Tax Codes or National Insurance categories as well as your P32 and P35 forms.
Payment/Deduction List – List of all payments and deductions made to your employees. Allows you to create a new payment or deduction.
Payslip List – View, edit or download in PDF format all issued payslips. You can also create a new payslip, or rollback P11 entries for a particular period.
Payroll Settings – Keep here your PAYE reference information together with Taxes, Student Loans and National Insurance bands and rates. View, modify and add Payment and Deduction Categories. You can also keep details of your Pension Providers and Pension Schemes.
Process Payrun– Choose your pay period and process payrun for all employees at once or select some of them and edit their payslips. This feature can be accessed both from the Payslip List and Payroll Settings.
READER’S COMMENT FORM
kpi.com Payroll System welcomes your comments and suggestions on the quality and this publication. Next revisions will be based on your information.
1) Were there any errors in the Guidebook?
2) Do you need more information? And in what section?
3) Were the screenshot examples enough?
4) What features were useful in this manual?
If any errors are found or you have other suggestions for the product and its manual improvement, please send us your comments through the following ways:
E-mail: support@www.kpi.com
Phone: +44 () 844 484 1120
+44 (0) 844 484 2958
+44 (0) 844 774 2253
+44 (0) 208 313 0711
Postal Service:
Finnet Limited
Sun Alliance House
29 London Road
Bromley
BR1 1DG
United Kingdom
 <alt=»Payroll System»>
 <alt=»Payroll System»>
 <alt=»Payroll System»>
 <alt=»Payroll System»>
 <alt=»Payroll System»>
 <alt=»Payroll System»>
 <alt=»Payroll System»>
 <alt=»Payroll System»>
 <alt=»Payroll System»>
 <alt=»Payroll System»>
 <alt=»Payroll System»>
 <alt=»Payroll System»>
 <alt=»Payroll System»>
 <alt=»Payroll System»>
 <alt=»Payroll System»>
 <alt=»Payroll System»>
 <alt=»Payroll System»>
 <alt=»Payroll System»>
 <alt=»Payroll System»>
 <alt=»Payroll System»>
 <alt=»Payroll System»>
 <alt=»Payroll System»>
 <alt=»Payroll System»>
 <alt=»Payroll System»>
 <alt=»Payroll System»>
 <alt=»Payroll System»>
 <alt=»Payroll System»>
 <alt=»Payroll System»>
 <alt=»Payroll System»>
 <alt=»Payroll System»>
 <alt=»Payroll System»>
 <alt=»Payroll System»>
 <alt=»Payroll System»>
 <alt=»Payroll System»>
 <alt=»Payroll System»>
 <alt=»Payroll System»>
 <alt=»Payroll System»>
 <alt=»Payroll System»>
 <alt=»Payroll System»>
 <alt=»Payroll System»>
 <alt=»Payroll System»>
 <alt=»Payroll System»>
 <alt=»Payroll System»>
 <alt=»Payroll System»>
 <alt=»Payroll System»>
 <alt=»Payroll System»>
 <alt=»Payroll System»>
 <alt=»Payroll System»>
 <alt=»Payroll System»>
 <alt=»Payroll System»>
 <alt=»Payroll System»>
 <alt=»Payroll System»>
 <alt=»Payroll System»>
 <alt=»Payroll System»>
 <alt=»Payroll System»>
 <alt=»Payroll System»>
 <alt=»Payroll System»>
 <alt=»Payroll System»>
 <alt=»Payroll System»>
 <alt=»Payroll System»>
 <alt=»Payroll System»>
 <alt=»Payroll System»>
 <alt=»Payroll System»>
 <alt=»Payroll System»>
 <alt=»Payroll System»>
 <alt=»Payroll System»>
 <alt=»Payroll System»>
 <alt=»Payroll System»>
 <alt=»Payroll System»>
 <alt=»Payroll System»>
 <alt=»Payroll System»>
 <alt=»Payroll System»>
 <alt=»Payroll System»>
 <alt=»Payroll System»>
 <alt=»Payroll System»>
 <alt=»Payroll System»>
 <alt=»Payroll System»>
 <alt=»Payroll System»>
 <alt=»Payroll System»>
 <alt=»Payroll System»>
 <alt=»Payroll System»>
 <alt=»Payroll System»>
 <alt=»Payroll System»>
 <alt=»Payroll System»>
 <alt=»Payroll System»>
 <alt=»Payroll System»>
 <alt=»Payroll System»>
 <alt=»Payroll System»>
 <alt=»Payroll System»>
 <alt=»Payroll System»>
 <alt=»Payroll System»>
 <alt=»Payroll System»>
 <alt=»Payroll System»>